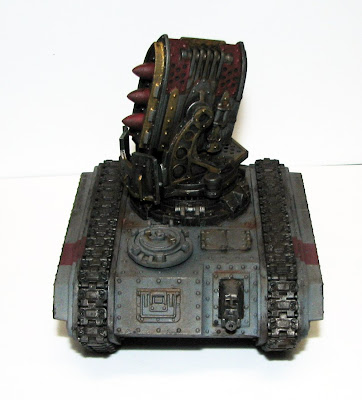
Since I want this to go with my Steel Legion/Death Korps of Krieg Imperial Guard army the main colors on this model needed to be a dark weathered gray and a nice dark red.
 I painted the gun and the rocket launcher separately. First I primed the tank black and then sprayed it with a gray primer that is really close to Fortress Grey. I sprayed it further back then normal and left some shadows in the recesses.
The next step was to add a bit of pre-weathering. I used Chaos Black and Boltgun Metal to apply a few paint scratches. At this time I also picked out a few details like the gun and the rear door handle. I then lightly washed the entire model with Badab Black.
 Once the wash was dry it was time to break out the weathering powders. I wanted the tank to look used but not in an exaggerated way like my Ork Looted Wagon. I slowly added bits of the rust powder and track brown powder to give the model a nice worn in look.
I had finished the weathering and was pretty happy with it when Monkey and Jester stopped by. They both liked the rocket launcher on top of the model, but they suggested that I add some contrast to the bottom. I decided to paint a nice thick red stripe on the side of the tank. I had never done anything like this before so it was a learning experience.
I broke out the masking tape and taped off the area I wanted to paint. I then used my airbrush to fill in the taped off area. It worked like a charm. This simple step really added a lot to the tank.

After the stripe I glued the Tank Treads down and started weathering them and the bottom of the tank near the ground. I primarily used the track brown powder but I also snuck in just a bit of the grime effect as well. This gave some more definition to the tank and helped break up the solid gray color scheme.
 The rocket launcher was really fun to paint. I started wtih a nice dry-brush of Boltgun Metal over black primer and then added the base colors. I then washed the model with Badab Black. Once they dried I sued the MIG Rust Effects to weather it and it was good to go.
 All in all this is my favorite vehicle that I have worked on so far. Everything just went together really smoothly I was really happy with how the paint job turned out.